HP/HT wells create new challenges for coiled tubing
T. McCoy
R. Rosine
C. Aulert
Halliburton Energy Services Inc.
J. Martin
R. K. Stanley
Quality Tubing Inc.
The coiled tubing industry has begun to perform service work on deeper and higher-pressure wells. It is not uncommon to rate tubing for use at 10,000 psi. Pre-vious experiences with high-pressure/ high-temperature (HP/HT) strings, however, have strongly indicated that additional testing of coiled tubing (CT) is required to ensure the integrity of the tube wall throughout its service life. Upon review of the issues, it was decided that both short-term and longer-term solutions and actions were required. Likewise, string manage-ment and tubing maintenance issues were recog-nized as essential components in completing the mission of providing reliable tubing to the CT operators.
Enhanced inspection
Involvement with several string problems over the last year highlighted the need for increased assurance of seam weld quality as well as a need for higher assurance of tube body integrity. This assurance is vitally needed, of course, for HP/HT strings, but the case can also be made that all work strings deserve total integrity assurance.
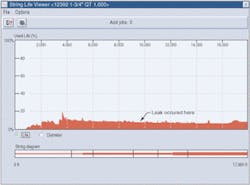
The primary incident that suggested enhanced inspection of milled strings was needed occurred in August 2000 in Aberdeen. A leak was detected during pressure testing of a 1.75-in. outside diameter (OD) QT-1000 string in preparation for a HP/HT job. The string was relatively new.
It should be noted that leakage was not apparent after pressure testing at 5,000 psi, but was only identified after testing at pressures in excess of 10,000 psi. The original mill hydrotest pressure was 11,800 psi, at which time there was no leak.
A formal investigation concluded that the leak was the result of small weld-line imperfections in the longitudinal seam weld. Evidence collected during the failure analysis suggested that the string contained lack-of-fusion defects after milling, as opposed to initiation-of-weld cracking during service work.
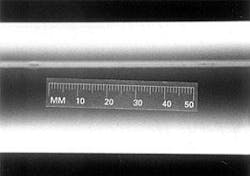
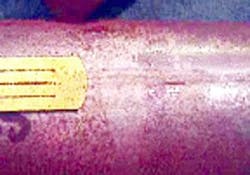
The independent laboratory that conducted the failure analysis could not detect the precise leak locations by visual examination, fluorescent magnetic particle inspection (MPI), or liquid penetrant inspection. The failure of an MPI to detect leaks was surprising but may have been due to surface conditions of the tubing. Radiography was able to reveal the defects via a volumetric change at the inside diameter (ID) in the flash line.
Eddy current and alternating current field measurement were able to identify only one of three defects. The failure analysis concluded that the weld-line defects were initially of such small size and so tightly compressed that they could not be detected by the mill-line eddy current device or the mill hydrostatic test. Indeed, these small defects did not hamper initial service work, but were only detected by high-pressure field hydrostatic testing after several cycles.
Further laboratory inspection by the tubing manufacturer demonstrated that ultrasonic testing was able to clearly detect the flaws using an ultrasonic flaw detector with a 5 MHz transducer and a special wedge so that the angle of the sound beam was positioned correctly at the weld seam. At this point, the flaws were also detectable by dry MPI. Although this hand-held ultrasound technique is suitable for prove-ups, a mill-line ultrasound unit is needed for a full-string inspection.
When a replacement string was milled, an off-line inspection was performed using a rotating pole magnetic flux leakage (RMFL) inspection device after the string passed hydrostatic pressure testing at 90% of the specified minimum yield strength. The RMFL inspection showed two defective areas in the tubing body, not the seam weld-line. Prove-up inspection determined that the defects were indention-type flaws that were in the strip prior to milling the tubing. These flaws were on the ID of the tubing, making it difficult for the inline tube mill eddy current inspection device to detect. Unfortunately, the flaws were considered unacceptable, and the string had to be remilled. Based on these incidents, it was apparent that better inspection devices, covering both the tubing body and the seam weld, were required to promote a higher level of confidence in string integrity.
Extensive research has been conducted recently into why CT fails, so that the industry is now generally well apprised regarding failure modes. At least two Drilling Engineering Association seminars in 2000 were devoted to ways in which non-destructive evaluation (NDE) could reduce the number of failures during the working life of a string. Working at pressures in the range of 10,000 psi results in low cycle-life for existing CT products, and the presence of imperfections in the tube has been found experimentally, and recently by calculation, to further lower the life. These findings indicate that a higher level of manufacturing inspection, as well as a higher level of in-service monitoring and maintenance, is needed for work on HP/HT wells.
New test standards
To evaluate the effectiveness of current CT inspection equipment and new inspection devices, new test standards were developed and run through all of the NDE equipment that the tubing would experience.
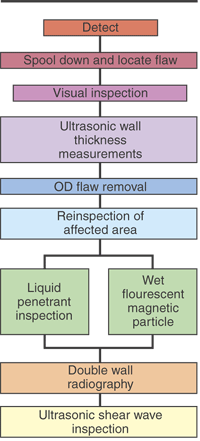
In response to a corrective action, a short-term program was put together, using readily available NDE equipment to provide the highest level of inspection possible for strings manufactured before complete implementation of a longer-term solution.
Short-term solutions
To improve HP/HT string quality, the following short-term solutions were implemented.
Longer-term solutions
The short-term solutions met existing internal and external requirements. Fur-ther action was initiated to reduce the problem in the manufacturing process, as suggested by standard qual- ity theory. For the longer term, four tasks were identified:
- A new set of test standards was manufactured from sizes representing HP/ HT strings currently under production (typically, 1.75-in. by 0.188-in. and 0.134-in. wall QT-1000)
- Because the inspection of wide (1-m) strip at a strip mill presents a major challenge for the strip manufacturer, it was reasoned that inspecting the strip, after cutting to width, represented the best solution
- A study was instituted to determine the cause of tubing imperfections that are not readily detected by in-line eddy current NDE
- In-line ultrasound was instituted to focus sound into the weld-seam area.
Overview of evaluations
The high points of the evaluations were:
- In-line eddy current system detected all of the TDHs, and most of the notches, but at a sensitivity that is too high for everyday operation
- For the rotating pole inspection, the final EMI MFL system was run with two linear arrays of sensors (each 0.625-in. long), connected in opposition to accentuate short longitudinal imperfections. Testing showed that equipment could detect 10% (specified wall thickness) internal EDM longitudinal and transverse notches 0.25 in. long
- Many in-service CT inspection units only magnetize the tubing longitudinally, and the MFL detection schemes (encircling rings of solid-state sensors) are therefore not responsive to longitudinal planar weld-seam problems such as penetrators. The unit evaluated indicated the need to place the sensors as close as possible to the pipe surface
- Most electric resistance weld (ERW) tube mills manufacturing high-strength oilfield tub-ulars and line pipe have installed ultrasonic inspection systems in close proximity to the welder to detect this problem.
Pipe management program
Institution of a pipe management program was considered essential to help ensure that all tubing, including HP/HT strings, sent to offshore locations are in a safe and fully serviceable condition. The following is a summary of the pipe management program:
- All reels/spools are stored in a protected environment until required for service
- All spools returning from location are respooled and visually checked for damage or corrosion during spooling to storage reels
- All spools returning from location are externally wire-brushed, treated with corrosion inhibitor (both externally and internally), and finally nitrogen-purged to remove all air
- All spools are to be maintained with a positive pressure of N2 while in storage
- All E-line spools returning from location will have the cable removed to negate the possibility of galvanic corrosion between the pipe and cable
- All strings are to be NDE on a six-month rotation, or whenever damage is reported or signs of corrosion are suspected that could affect the integrity of the string
- All spools are to be cleaned internally with wire brush and hydrotested per job requirements prior to mobilization
- Complete service history files are to be maintained for each string. Fatigue data are to be maintained using Cerberus software
- Real-time fatigue monitoring is available for critical operations or at the request of the customer.
A determination was made to dispose of inspected strings as follows (unless other agreements are made):
- Removal of minor imperfections by sanding is acceptable. A minimum of 95% of the specified wall thickness must remain after sanding for class 1 operations. The repaired area must not show any transverse scratches
- Inspection results are reviewed and strings classified. String derating factors for each class are dependent on prior string history and anticipated service requirements.
Conclusions
Previously used mill ET inspections have been shown to be inadequate for HP/HT strings. Short-term solutions were implemented to help assure present tubing integrity. Longer-term solutions were initiated to employ the use of new state-of-the-art inspection equipment.
The short-term solution employed conventional EMI technology and improved prove-up. Testing showed that equipment could detect 10%-t internal EDM longitudinal and transverse notches of length 0.25 in.
The longer-term solution employs the installation of a strip inspection device to detect strip problems, and a phased-array ultrasound system for inspecting the seam weld and heat-affected zone in the presence of an internal weld flash.
To assure quality of HP/HT strings, proper maintenance and periodic inspections per documented requirements are necessary.
Editor's Note: This is a summary of SPE 74830.


