DRILLING & PRODUCTION
Frank Hartley • Houston
null
Photographs generate accurate field measurements
Another method to collect field measurements for equipment in the field, and a direct way to generate new 3D CAD models, is to take some pictures.
Shan Pehlman, design engineer with CDI Corp., says he derives accurate measurements from ordinary photographs through desktop software called PhotoModeler, developed by Eos Systems Inc.
When consulting with oil refineries on replacing an aging pipeline, as-built drawings of the old infrastructure may not be available for his reference. Even if available, Pehlman generally considers them poor counterfeits for real-world fittings.
“As-built drawings are an imperfect world,” says Pehlman. “With equipment that is 30 or 40 years old, with modifications thrown in, the drawings are not going to match what’s there. Everyone at the plant realizes this is the major difficulty, so they hire an outside firm to take care of it.”
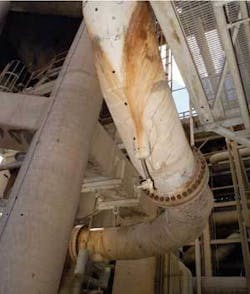
In order to handle a pipeline replacement such as the refitting of a stretch of 20-in. pipe that rambles through a refinery, up four-story towers, through walls, and between other plant equipment, it is more accurate to measure what is actually there.
The real pipe often differs from the original as-built plans because installers likely altered it according to in-the-field contingencies decades earlier. The original installers may have made a series of customizations to create a seamless fit of segments and to account for obstacles.
“There are other options, but this software is an accurate way to conduct a survey. We can do it by hand with a measuring tape, but with a large bore pipe that big, it’s very, very difficult to be that accurate over multiple stories,” explains Pehlman. “We can use a laser survey machine, but that’s not quite as accurate as the software, especially when there is a lot of obstruction.”
Old techniques automate
A minimum of two photographs of an object from multiple angles is required in order to recreate the 3D dimensions in CAD. The method automates the old techniques of photogrammetry, measurement from photographs.
The technology has attracted organizations specializing in industrial measurement and reverse engineering. The non-contact method has advantages: it is not limited by the size or shape of the photographic subject and it can measure sub-centimeter flaws . The application also comports with most common CAD system formats, so the models integrate with other design work. This method does not require a substantial investment in measuring instruments since cameras are generally readily available.
Pehlman says that the software is also suitable for the industrial environment, since large, sometimes hazardous, equipment can be documented at a safe distance. “I’ve used this software in the past for industrial units as hot as 700°, and in tight, congested areas, and up a 200-foot tower, as in this pipeline case.” He compares a field survey with a camera to one performed with a laser-guided Total station.
Requiring less equipment, the camera field survey can be done with fewer people, says Pehlman. “Many companies will go straight to laser measurement and think it’s an end-all solution to their needs. Often, however, photogrammetry is more economical and much faster.”
Precision CAD from photographs
After a camera thoroughly captures every bolt, flange, miter cut, and curve on a 60-ft stretch of oil pipeline in Corpus Christi, Texas, Pehlman is ready to process the digital photographs into 3D CAD.
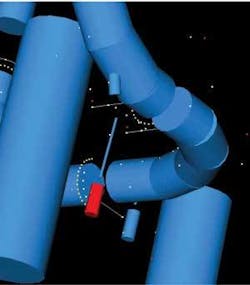
He matches corresponding points on the images after uploading the photographs into the software. Once enough matching control points have been established, the program can adjust the photographic scene into a 3D axis, accurately drawing the real-world parts into a CAD model.
The photogrammetric analysis uses the camera parameters to solve for measurement units in the photographic scene. His photo-model is accurate to within one centimeter for 20-in. pipe, which meets the requirements for this specific job. Tighter accuracy may be achieved, says Pehlman, by increasing the number of photographs and points matched in the project.
A cylindrical shape feature in the software enables outlining of the exterior lines of the bore, and the program automatically extrapolates the 3D surface. A 3D voluble model of the configuration then exports to engineering CAD systems, ready for fabrication.
The end result is a new installation that fits perfectly. Because the new pipe is set in place with the help of a crane and a large crew of workers, the decreased need for modifications and re-adjustments prevents costly downtime.


